|
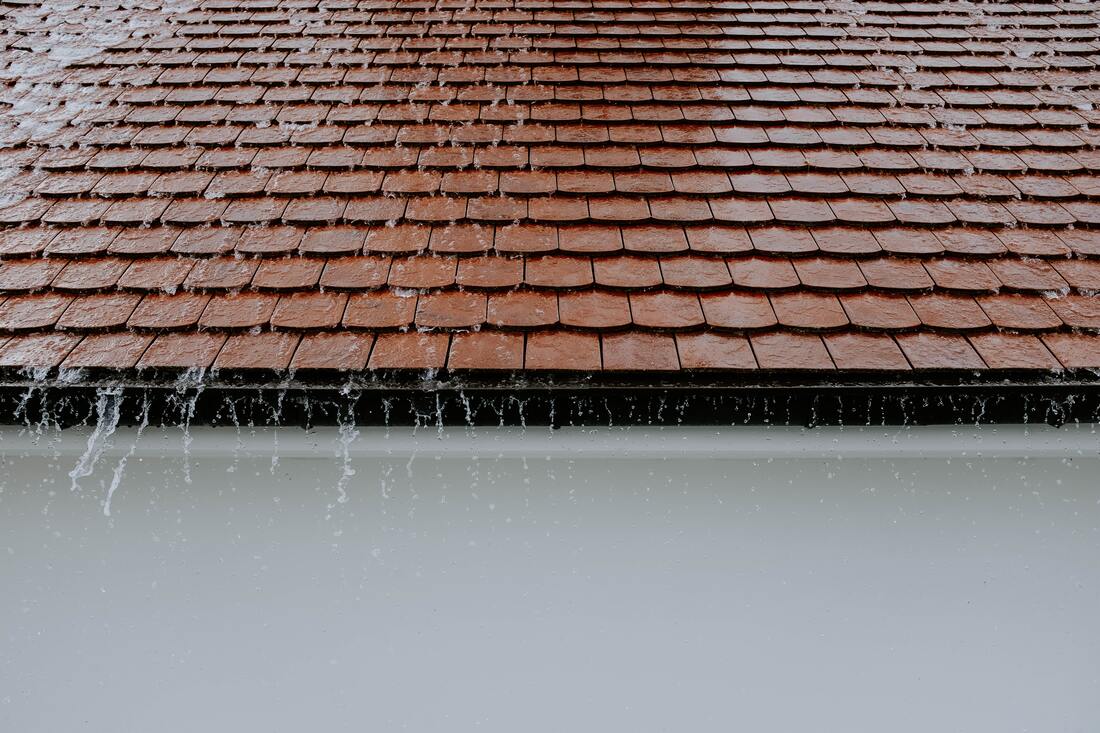
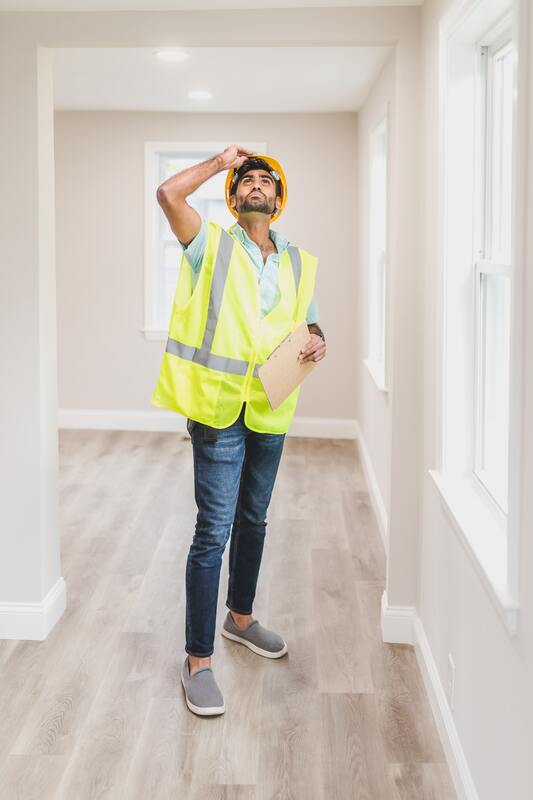
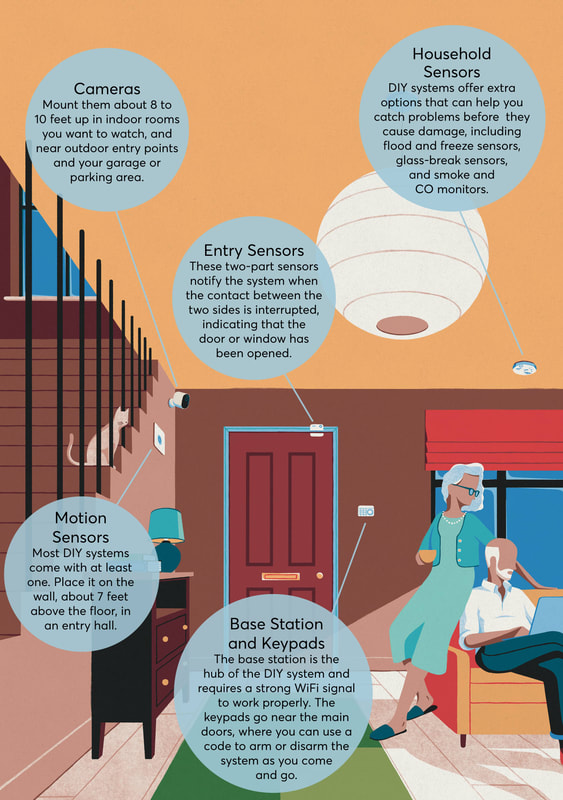
Additional Notes from Carl Johnson You can find any reason to be worried nowadays… and to have peace of mind when it comes to your home’s safety and security is priceless. Consumer Reports released an article titled Keep Your Home Safe and Secure - Consumer Reports where they give key tips to help you ensure your home is set up in the case of an emergency to best help you as a home owner. In this article I highlight facts that as your Realtor and friend I feel are valuable to you and your home. The following sections are from a Consumer Reports article by Janet Siroto from February 02, 2023. Protect Your Home From the Outside Rain, snow, sleet, hail, and heat waves can all take their toll on your home. And sometimes, a critter or even a burglar may attempt a perimeter breach. Fear not: It doesn’t take a massive amount of effort or a huge investment to protect your place. With a bit of planning and some smart prep work, you can keep your property in prime condition. CARL’S NOTE: CLICK HERE to read about our feature article on Home Inspections to learn about the many options you have as a home buyer. An inspection may cover your home from roof to basement and all that is in between to help give you an idea of areas of the home that may need better improvements and protections. Roofs, windows, doors, and radon levels are a few of the inspections that are available to you. Photo by Adrien Olichon Inspect the Roof Leaks tend to be a major issue—and fixing damage to the surface of the roof or the rafters can cost a bundle: A new roof costs, on average, $8,994 (more if the roof framing needs replacing). You could try to spot potential problems with binoculars, but that probably won’t tell you the full story (and please, no climbing on the roof yourself). “A proper roof inspection involves checking five zones: the home’s interior, attic, perimeter, exterior, and the rooftop itself to look for existing and emerging issues,” says Paul Watrous, president of the National Roof Certification and Inspection Association (NRCIA). This process identifies where moisture might be seeping in; any cracked, curled, or missing shingles; and issues with flashing around skylights, chimneys, and vents. Though you may see contractors offering free inspections, Watrous cautions that these can come with a hidden price. “They’re doing free work as a potential first step to paid work,” he says. “Know what you are getting into and check the company’s references.” An alternate route: Pay an NRCIA-licensed professional (search by ZIP code) to perform an annual inspection. For a 2,500-square-foot house, this is likely to take about an hour and cost around $400; if the roof is in good shape, you can add a roof certification for two years at about $350. While this won’t cover damage from hurricanes and other acts of God, if your roof leaks for other reasons, the repair will be free. CARL’S NOTE: As important as it is to take care of your roof it is just as important to take care of your home’s foundation. CLICK HERE to read our article on 4 Tips: Creating Healthy Foundations for your home. Taking the time to make sure your house foundation is clean, strong, and protected can save you much heartache and money! Clean Those Gutters If your gutters are packed with fallen leaves, pine needles, and other debris, water can cascade over the edges and seep inside your home, causing damage. If the wet mess in your gutters freezes during bitterly cold days, ice dams can damage the gutters and prevent them from routing melting ice and snow. Getting your gutters thoroughly cleared once or twice a year costs about $160 per cleaning (this is the national average; actual costs can vary depending on your location and the size of your house). Flushing out the downspouts could add $50 to $100. Or you can install a gutter-guard system (between $100 and $2,000 for 200 feet installed, depending on the material you choose; steel mesh is considered top-notch). This offers fire-prevention benefits as well. Seal Up Possible Leaks In addition to keeping your roof in good shape, consider having a qualified contractor caulk and brace roof soffit vents to reduce the amount of water blown into your attic during hurricane-force winds and rain. While you may be tempted to caulk your windows, proceed with caution, says Kurt Clason, remodelers chair of the National Association of Home Builders and owner of Clason Remodeling in Ossipee, N.H. “Except for homes with wood windows, you probably have composite window frames, which need to move and contract as the temperature changes,” he says. “You don’t want to interfere with that.” But Clason does recommend using a bead of caulk to seal thresholds of exterior doors. Prevent Hail Damage In 2018 there were 4,611 hailstorms across the country. They can harm outdoor equipment and lead to water damage. If you live in a hail-prone area, use covers to shield essential gear, such as your air conditioner, pool mechanicals, and grill. These covers can be made with solid plates or breathable mesh that doesn’t interfere with functioning. They’re sometimes referred to as “armor top” covers and can be purchased online for about $40. Do a Tree and Debris Check When a heavy tree limb goes flying midstorm, it can wreak havoc on your roof, windows, or car. A trained arborist (look for your state’s arborist association for leads) can check trees’ location and health and recommend pruning or other action. You’ll want to repeat this process every three years or so. The cost of professional tree trimming averages $460 but varies greatly. Tree removal costs about $750 but can run from $200 to $2,000 or higher (if, say, you have a gigantic old tree in a hard-to-reach spot). You may be able to cut small branches safely and effectively yourself with hand pruners or a telescopic pole saw. It’s also important to have at least a 5-foot buffer around your home that’s free from yard debris and dead plants. These are a tremendous fire risk, says Ian Giammanco, PhD, lead research meteorologist at the Insurance Institute for Business & Home Safety. Shield Chimney Openings Few people want squirrels, bats, birds, and other wildlife taking up residence inside their home. To keep out unwanted visitors, make sure chimneys are capped; installing a cap typically costs about $300. Look for one that has wire-mesh panels, says the NAHB’s Clason. A cap can also reduce the chance of embers drifting out of your chimney and starting a fire. Do a Perimeter Check Take a look at your home from the yard and the street as if you were a thief. Are there bushes you could hide behind and then pry your way inside? Can you see valuables? Small moves like cutting back shrubs and closing the curtains can help to secure your property. Evaluate the Entrances Exterior doors should be metal or solid wood, at least 1¾ inches thick. Otherwise, they are too easy to bash in. Do you have sliding patio doors? Do they lock well? If not, replace or secure them. Options include adhesive film that makes the glass harder to break and rods to stop thieves from jimmying the doors. Make sure all window and door locks are working—and use them. Deadbolts with a pick-resistant cylinder are best for doors (see our door lock ratings and buying guide); the strike plate should be reinforced, or it could give way with one good kick. Install Outdoor Lighting Being bathed in light could send a potential burglar packing. Add motion-sensor bulbs to fixtures near entrances (available at home centers or Amazon, from about $18 for two)—no electrician required. Photo by RODNAE Productions Protect the Inside of Your Home While it’s important to secure your home from the outside, the interior can benefit from a watchful (electronic) eye as well. Indoor monitoring can tell you if there’s any risk to loved ones or pets or stop a problem before it starts—and causes pricey damage. CARL NOTE: CLICK HERE to read our feature article on Smart Home Technologies for your home to learn about how you can tie home securities into your other smart devices. Having any level of home security can protect your home as well as give you comfort in knowing you are safe. From fully monitored professional installed systems to a simple video doorbell, there are a variety of style and pricing options available to you as a homeowner to protect your home. Watch Over the Indoor Environment Smart thermostats, such as our two top models, the Google Nest Learning Thermostat, about $199, and the Honeywell Home T9 RCHT9510WF Thermostat, about $170, connect to a smartphone app, allowing you to remotely control your home’s heating and cooling. This is convenient—and can help you avoid disaster during unexpected cold snaps or heat waves while you’re away. A temperature below 32° F is most likely to lead to pipe damage. But you’ll need to set your thermostat well above that level (some experts suggest 65° F or above) to make sure that the areas inside your walls where the pipes are—which can be much colder than the interior of your home—stay at a safe temperature. A smart thermostat can also help you track heat and humidity. The Environmental Protection Agency recommends indoor humidity in the 30 to 50 percent range to avoid mold, mildew, and bacteria growth, or the humid conditions dust mites (a known allergen) thrive in. Maintain HVAC Systems Have your heating, ventilating, and air conditioning systems inspected every year. The average cost is $75 to $200, and it can help keep your system operating smoothly and economically. What’s more, it can ward off damage, such as a fire from a furnace issue or water damage from your AC’s condensate pan overflowing. Avoid Likely Leaks “A leak detector is like wearing a seat belt,” says Kirk MacDowell, CEO of security consulting firm MacGuard Security Advisors. “You don’t realize its value until you need it.” And you may well need it: About 1 in 60 insured homeowners file a water-related claim every year. These devices either measure the flow rate in pipes on your main water supply or detect water leaking onto the floor. They can be put near your water heater, under sinks, by pipes that run to your washer, and near exterior walls that could freeze. The detectors can be security system add-ons or purchased independently. They can notify you (and possibly a central monitoring station) of leaks, and some can even turn off the water. CR’s testers like the Flo by Moen Smart Water Monitor and Shutoff, $500 to $750, which must be professionally installed, and the DIY Guardian by Elexa Leak Prevention System GVD3, $300 to $406. Don’t Let a Thunderstorm Fry Your Tech Poof! One good lightning strike, and your valuable computer and TV can sizzle their way out of service. Surge protectors are helpful, but Giammanco recommends putting your most valuable devices on an uninterruptible power supply, which is a bigger version of a power strip that looks like a black box. Prices range from around $50 to hundreds of dollars, depending on the type. If you live in an area known for frequent lightning storms, such as central Florida, you might want to consider a whole-home surge protector, a device that goes on your breaker box and costs around $500. Do a Fire-Safety Sweep In 2021, a home fire was reported every 93 seconds in America, and a home fire injury occurred every 47 minutes. Help protect your home and loved ones by requiring all smoking to take place outside and having smokers douse butts to extinguish them; taking care not to leave burning candles unattended; and moving combustible materials (such as papers) away from space heaters—and always turn those off when you leave a room or go to bed, the American Red Cross says. Make sure you have operational smoke and carbon monoxide detectors, such as CR’s top-rated First Alert Smart ZCOMBO-G (1039833) Combination Smoke & Carbon Monoxide Detector, $55, located in or near bedrooms. Change the batteries whenever the clocks spring forward or fall back. Put Security Cameras in the Right Spots If you use security cameras indoors, make sure you position them in locations suited to your specific areas of concern. • If you’re worried about intruders, you’ll want to monitor the area they’ll walk through first if they get inside your front or back door (e.g., the hallway or mudroom). • Add cameras in rooms where your valuables are kept, such as areas where you display collections, have expensive electronics, or keep cash. For privacy reasons, it’s best not to install cameras in bedrooms. • Mounting a camera in a corner usually delivers the widest view; just be careful not to aim it at strong indoor or natural light, which can wash out the video and make it hard to see what’s happening. • Want to keep an eye on pets? Place a camera where they spend most of their time. • If you have an older person living with you and you worry about falls, you might want to install an indoor camera to monitor your home’s staircase. Get a Security System The latest FBI statistics show an estimated annual loss of $3 billion due to burglaries, with an average loss of $2,661. But a security system can be a deterrent. In University of North Carolina at Charlotte research involving 400-plus convicted burglars, about 60 percent of respondents said they would keep moving if a potential target had one. A security system might also save you 5 to 20 percent on your insurance premium, depending on how sophisticated it is. The word “sophisticated,” in fact, describes how this category is evolving. Artificial intelligence and video analytics help cameras and sensors to better distinguish between, say, your dog chasing a squirrel and a burglar attempting to get in, says Elizabeth Parks, president and chief marketing officer at Parks Associates, a technology research and consulting company. Today’s systems can also monitor for smoke and more. Your Home Security Toolkit Keeping your home secure starts with sturdy locks on all entry points. A security system adds another level of protection, alerting you to a breach at any of those entries or to unexpected movement inside the house. A DIY system, such as those from Ring and SimpliSafe, is fairly easy to set up and typically operates via an app on your mobile device, allowing you to monitor it on the go. The equipment in starter kits for these systems varies slightly, but the kits generally include a base station, a keypad, and some combination of door and window sensors, motion sensors, and cameras. Some have a range extender to enhance coverage. Most systems also offer optional extras, from panic buttons to glass-break sensors to smoke and carbon monoxide monitors, for about $35 to $40 each. You can also install smart wireless WiFi-enabled video cameras, a video doorbell, a thermostat, smoke and CO detectors, leak detectors, and more that are independent of a security system but still allow remote control. The above sections are from a Consumer Reports article (CLICK HERE to read the full report): Photo Credit: Keep Your Home Safe and Secure - Consumer Reports Home Security System Basics Considering a home security system? Here are some common components that CR tests, and that you’ll want to be familiar with: DIY security systems: These wireless setups are typically easy to install yourself, without an electrician. They are sold as starter kits, and you can add more components and sensors à la carte. Some offer optional professional monitoring. Security cameras: Wireless security cameras connect to WiFi and can be plugged in for power or run on a rechargeable battery. You monitor them yourself via a smartphone app. Video doorbells: They offer all the features of a wireless security camera while also alerting you if someone rings the doorbell. You probably won’t need an additional security camera covering the same door. Door locks: A high-security drillproof lock is the best option. New smart locks—also available in retrofit versions that add on to an existing lock—offer conveniences such as remote locking and unlocking. Pro-Installed Security Systems The security systems we test are kits that you buy and install yourself with basic tools. But you can also use a company that provides professionally installed systems, such as ADT or Vivint, to design a system for your home and install it. Here’s how to decide which type is best. What’s your budget? A professionally installed system is probably the more expensive option. “I’d estimate $1 per square foot for an installed system that is monitoring all the doors and windows of your home with sensors,” says Kirk MacDowell, CEO of security consulting firm MacGuard Security Advisors. “Video cameras will add to the cost.” You’re likely to pay between $15 and $30 per month for monitoring. A basic DIY setup will cost much less (see above), but adding components—door and window sensors, cameras—can easily drive that price up significantly. How big is your home? If you live in a smaller home with a simple layout, you may be fine with a DIY system. This can be a good solution for renters, too. But if you live in a home with, say, multiple entry points, sliding glass doors, a guest cottage or workshop out back, and other features that make it more challenging to monitor, you might do better with a professionally installed system. Do you want to monitor your system yourself? A pro security system will come with required monitoring (for a monthly fee)—so if an alarm goes off, it will alert the company’s service, and they’ll call emergency personnel. Most DIY systems offer monitoring (and may require it) for a fee each month, but some let you monitor your alerts yourself at no extra charge. See our review of the best self-monitored security systems with no monthly fee. Editor’s Note: This article also appeared in the March 2023 issue of Consumer Reports magazine.” CLICK HERE to read our article on the First Time Homeowner Checklist to see some key points to help you get started to being a homeowner.
0 Comments
Leave a Reply. |
Archives
July 2024
Categories
All
|


 RSS Feed